Zone Air Build Your Own Tool: How Does Configuring a Mini Split Kit Work?
For nine years, I’ve been deep in the trenches of home renovations where mechanical choices—like your heating and cooling system—can either make or break the look and feel of a room. Mini splits, in particular, have revolutionized the way we think about comfort coupled with aesthetics. But when it comes to assembling your own ductless HVAC system, the line between true DIY and not-really-DIY can get blurry. Enter the Zone Air Build Your Own tool, a powerful way to customize your system configuration and tailor it to your home's unique needs.
Today, I’m diving into how these kits work, how they compare to offerings from other key players like MRCOOL and Pioneer, and why certain mechanical choices become pivotal decor decisions. Plus, I’ll cover the often-overlooked but critical aspects of line set strategy and the risks of mixing air handler types on a single condenser.
True DIY Versus Not-Really-DIY Mini Splits: What’s the Difference?
Let’s start with a confession: “DIY” mini splits get tossed around liberally in the market. But there’s a big difference between kits that you can genuinely install yourself and those where you still need a licensed HVAC technician to handle line set brazing, electrical hookups, or system charging.
- MRCOOL’s DIY kits: These stand out because they come pre-charged with refrigerant and include quick connect fittings. This means you can bolt them together without vacuum pumps or refrigerant handling tools. Real DIY.
- Pioneer’s bundles: While popular and sometimes touted as “DIY,” most require brazing or professional line set assembly unless you buy specific pre-charged kits.
- Zone Air Build Your Own tool: This platform allows you to configure custom bundles including pre-charged, quick connect options, but the onus is on you to understand what’s needed for installation. It’s almost DIY but not entirely plug-and-play.
If you’re someone who’s comfortable running electrical circuits, drilling holes, and mounting units but not refrigerant handling, I always recommend sticking with pre-charged kits that use quick connect fittings. Not only do they reduce installation complexity, but they also help avoid common line set leaks brought on by improper brazing.
Quick Connect Fittings: Why They Matter
Quick connect fittings, which you’ll find prominently in MRCOOL kits and increasingly in kits configurable via the Zone Air Build Your Own tool, are a game changer. Traditional line sets use copper tubing that requires brazing—that’s a high-skill, heat-intensive process prone to leaks if not done right. Quick connect fittings slip over pre-flared tubes, seal tightly with O-rings, and snap together. They are more forgiving and encourage a true DIY approach.
However, always double-check local codes and inspection requirements—these fittings is often great for many jurisdictions but not all.
Aesthetics and Placement as Decor Decisions
Let’s be honest: a mini split air handler is no longer just a mechanical box on your wall; it’s part of your home’s aesthetic language. Whether you’re building a new gallery wall or preserving an original plaster surface with cutout cardboard templates, placement and style choices matter deeply.
- Using cardboard cutouts to test placement: Before final mounting, cut cardboard templates to mimic the dimensions of your head units. Tape them at various heights and positions to observe sight lines from inside and outside. This step is crucial to avoid a bulky unit ruining an otherwise pristine wall or window view.
- Unit design options: Companies like Pioneer and MRCOOL offer sleek white panels, but Zone Air’s tool allows you to explore several brands and models. Think beyond functionality—how does the line hide (the tubing where refrigerant travels) look from the patio? A poorly routed line set conduit can ruin your backyard’s ambiance faster than a stray garden hose.
One pet peeve I encounter on friend projects is rushing head placement decisions without considering sunlight glare, picture hanging, or furniture placement. Trust me, these aesthetic choices can set the tone for years to come.
Line Set Strategy and Leak Risk: The Fine Print
Whether you’re mixing and matching air handlers with the help of the Zone Air Build Your Own tool or sticking with a bundled solution, your line set strategy is critical. Consider these points seriously in your system configuration:
Aspect Recommendation Potential Risks Line Set Length Keep line sets as short as possible; use Zone Air or manufacturer guidelines. Long line sets reduce efficiency and increase leak risk. Brazing vs Quick Connect Choose quick connect fittings for DIY ease; otherwise, hire pros for brazing. Poor brazing leads to leaks; quick connects might be restricted by code. Coiling and Couplers Minimize excess coil; if needed, coil neatly avoiding sharp bends. Excessive or tight coiling can cause refrigerant flow issues and leaks. Line Set Insulation Use high-quality thick insulation sleeves to prevent condensation. Poor insulation leads to energy loss and potential water damage.Personally, I’m annoyed by the frequent glossing over of proper line set coiling and coupler selection in DIY guidance. Even the best configured bundle won’t help if your installer leaves sloppy, kinked tubing behind the walls or worse—makes a leak-prone joint.
Mixing Air Handler Types on One Condenser: Possible and Practical?
A common question I get is whether you can mix air handler types — say, a wall-mounted unit in the living room and a ceiling cassette in the dining room — on one multi-zone condenser system. The Zone Air Build Your Own tool supports this kind of system configuration, and many manufacturers, including Pioneer and MRCOOL, allow it to some degree.
Here’s my nuanced take:

- Compatibility: Confirm that the condenser supports multiple air handler types. Some zoned condensers allow mixed handlers, but check voltage and refrigerant line configuration compatibility to avoid operational issues.
- Balance and Performance: Different air handler types can have different airflow characteristics. Mixing them may require tweaking system balancing to optimize comfort.
- Aesthetic Coordination: Mixing handlers gives you flexibility—wall mounts for rooms where you want sleek design, ceiling cassettes in larger rooms that can hide the head and deliver even air distribution.
- Line Set Complexity: Be aware that each handler type might use different line set lengths and routing paths, increasing installation complexity and potential leak points.
If you’re using the Zone Air Build Your Own tool, carefully input the desired air handler types. The system will show compatible condensers and bundle options to help you avoid mismatch issues.
How the Zone Air Build Your Own Tool Works in Practice
Okay, enough theory—let’s get practical about using the tool:
- Start with your home’s heating and cooling needs: Do you need one zone or multiple? What size rooms?
- Select your condenser: Choose from single-zone or multi-zone units based on options from brands like Zone Air, MRCOOL, and Pioneer.
- Pick your air handlers: Mix wall mounts, floor cassettes, or ducted units depending on your layout and decor priorities.
- Choose your line set and fittings: Options usually include pre-charged quick connect kits or traditional line sets with couplers for professional brazing.
- Add mounting hardware, electrical components, and optional extras: Like condensate pumps or WiFi thermostats.
- Review and price your bundle: The tool aggregates everything and calculates costs. You can tweak selections if budget or installation challenges arise.
Zone Air’s tool is a blessing especially for those who know exactly what they want and are comfortable with the mechanical aspects—or have a trusted HVAC tech partner to finalize line set and electrical work.
Comparison Table: Zone Air Build Your Own Tool vs MRCOOL and Pioneer DIY Kits
Feature Zone Air Build Your Own Tool MRCOOL DIY Kits Pioneer Bundles Brand Flexibility High—multiple brands/models selectable Limited to MRCOOL models Moderate Quick Connect Fittings Available as an option Standard feature Typically requires brazing True DIY Friendly Somewhat—requires HVAC skill or pro help Yes—designed for homeowner install Mostly pro or HVAC tech installation System Configuration Customizable multi-zone, mixed handlers allowed Mostly single-zone or fixed multi-zone Multi-zone with some limitationsFinal Thoughts: Balancing Practicality and Aesthetics in Your DIY Mini Split Journey
Using the Zone Air Build Your Own tool lets you take command of multi zone mini split install your mini split system configuration in a way that wasn’t possible a decade ago. You can mix air handler types, size systems precisely, and tailor bundles to fit your space and budget. But don’t skip the mechanical realities. Proper line set handling, wiring, and leak prevention are mandatory and often require professional skill.
When planning your head unit placement, try my tried-and-true method: cut cardboard templates sized precisely to the air handler you plan to install, then tape them to your walls or ceilings and survey the room. Don’t forget to check how the line set hide will look from your outdoor patios or walkways. A gallery wall ruined by a chunky line set conduit? Trust me, it happens.
Ask yourself this: remember the few things that ruin a mini split gallery wall:
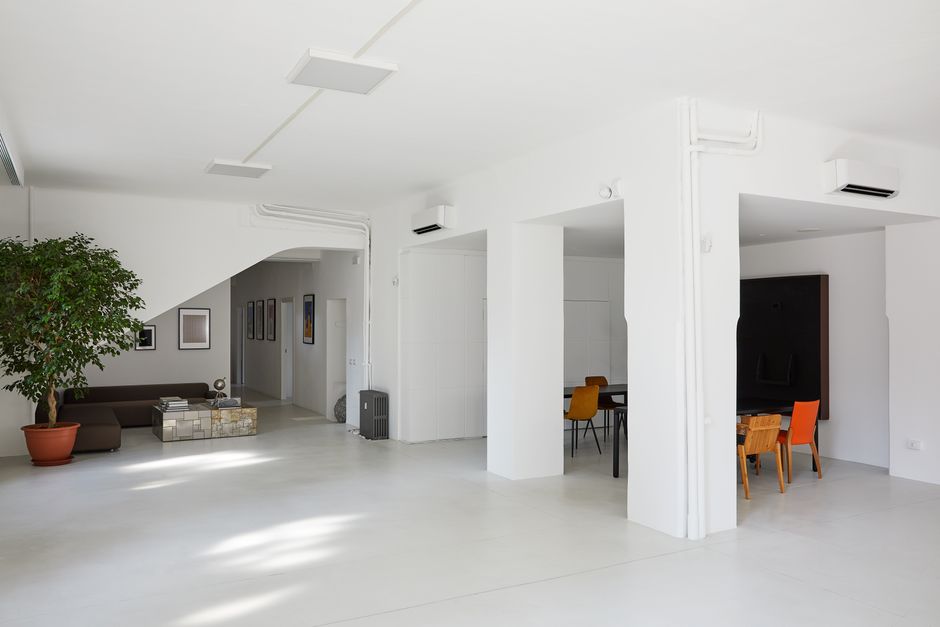
- Cluttered or overlapping head units
- Poorly routed or excessively visible line sets
- Ignoring room furniture flow when placing heads
- Uneven heights creating awkward sightlines
Finally, always double-check local electrical and HVAC codes before installation—common sense and adherence to safety will save you headaches down the line.
In the evolving world of mini splits, tools like the Zone Air Build Your Own platform empower you to personalize your climate control, without sacrificing style. When done right, your system will blend so seamlessly with your decor that your friends won’t even realize you did it yourself.